Today, in the world of online shopping, outstanding product pics are a super important thing! It makes people see what they are paying for. Ghost Mannequin Photography is a new awesome method of taking clothes pictures without any person or a mannequin. This gives the impression that the clothes are floating, and they look very good.
Today, in this article, we are going to discuss what Invisible Ghost Mannequin Photography is. We will also learn why it is better than the previous way of taking the product’s pictures. Let’s find out how this lovely trick can make clothes awesome!
What is Ghost Mannequin Photography?
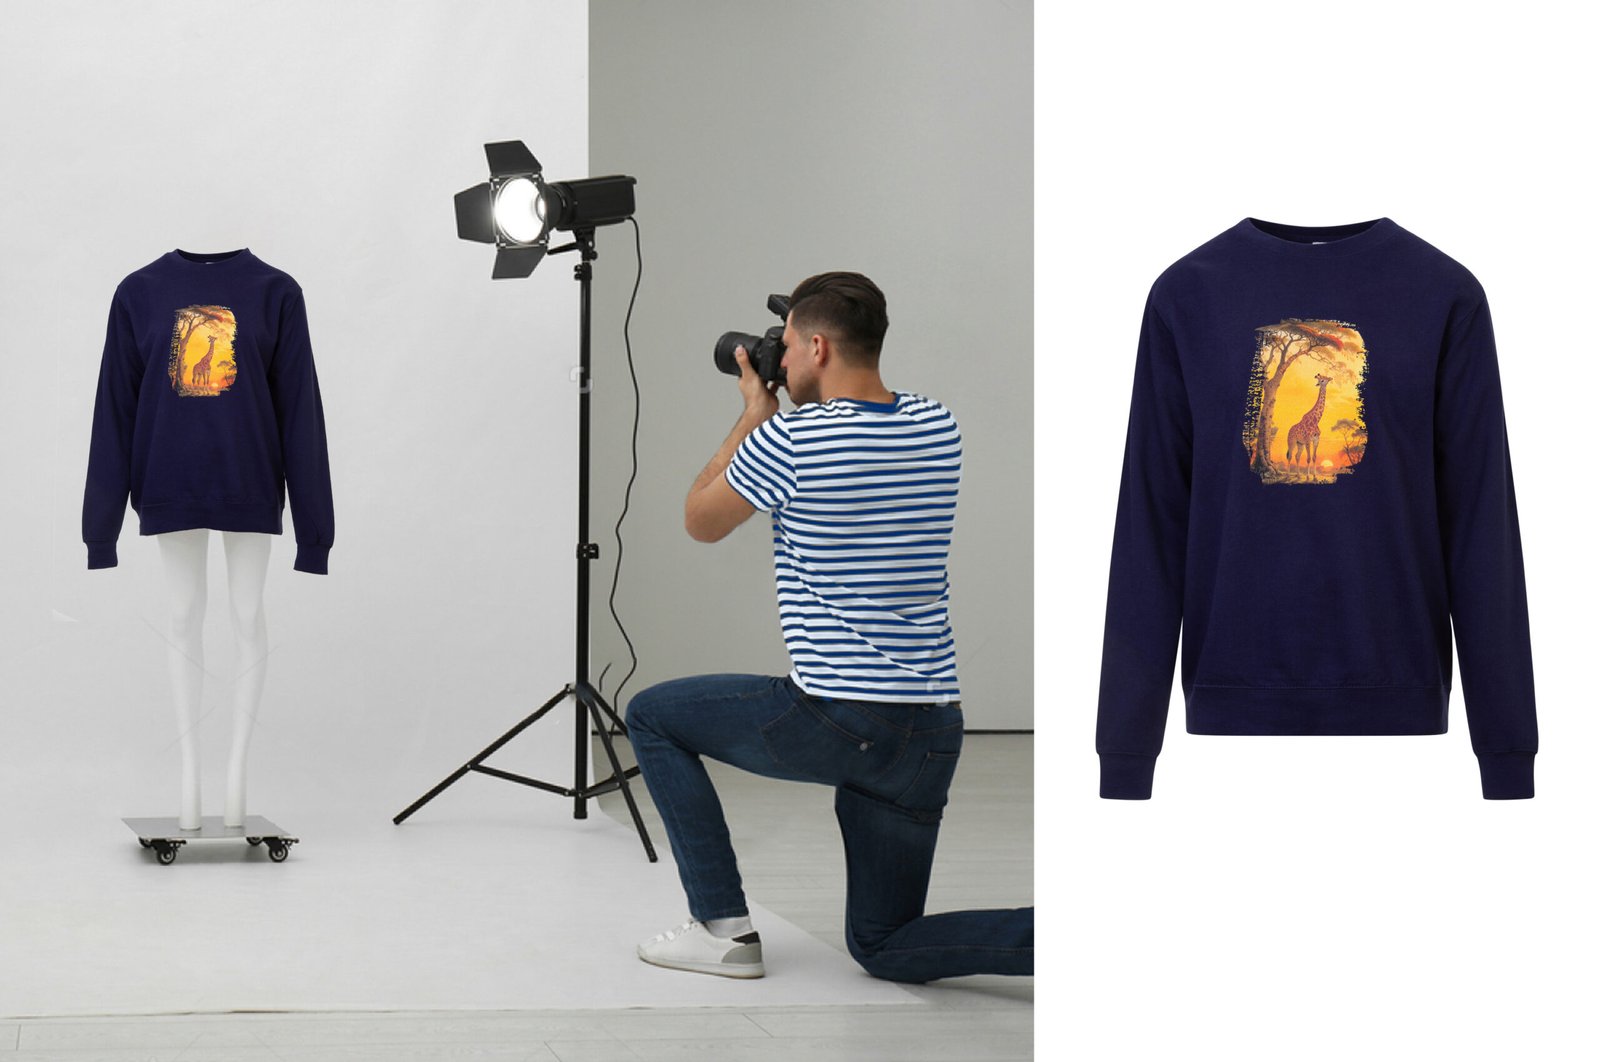
In invisible mannequin photography, an individual takes a picture of a product on a mannequin or a hanger and proceeds to edit out the mannequin or hanger in post-production to create a “ghost” effect. Ghost mannequin product photography is a good representation of the products by the e-commerce and fashion industries. All can take high-quality product images that depict details using invisible ghost mannequin photography.
Imagine you are moving a product that is floating in mid-air and no model of a visible mannequin is used. Isn’t it interesting? This is referred to as ghost mannequin photography. It is an approach through which pictures of clothes and other goods seem to be levitating.
Ghost mannequin photography also helps customers to make a purchase more easily. With the ability to make the right preparation and editing, this kind of photography can also be a good tool for your business and could help to increase your product photography.
Ghost Mannequin Photography and Flat Lay Photography.
There are many who believe that when you are making a decision of which style you are going to use for product photography, it depends on your budget, but I am thinking something else. The gap between Flat Lay and Mannequin photography is a deliberate decision, and this ties up to how you present your products to your audience. Nevertheless, I have discussed both styles below for a better understanding.
Ghost mannequin:
Ghost mannequin photography is one of the popular techniques in commercial photography, such as in the fashion industry, that is used to display the fit and close details of clothing items without the interference of a mannequin. A method that is used to produce clothing products without any obstructions is Ghost mannequin photography or invisible mannequin photography. In this kind of photographing of a product, you will just be required to erase the mannequin in the image during post-production and leave only the product visible.
Pros:
- It can be applied to a variety of clothes.
- The more unique the designs, customers will have a better view of the cut and the details of the clothing.
- It makes it possible to take a picture of the product from different angles.
- Make it easier for the customers to understand.
Cons:
- It is time-consuming compared to others because of the advanced post-production process.
- We require a professional stylist to arrange the product well in the mannequin.
- We are going to require a mannequin, which is expensive.
Flat Lay Photography:
Flat lay photography is the form of photography in which you have an item on a flat surface, facing up, and you photograph it from over the top. It is also a popular product in this kind of photography style.
Flat-lay photography will enable one’s ability to see the cut differences, such as straight/slim or leg width in pants. Therefore, this method is more viable for the trends that sell the usual products like t-shirts, pants, or hoodies. From laid-flat products to naturally hanging objects, flat-lay pictures can be able to create many effects.
Pros:
- It can demonstrate differences in cuts without special styling.
- Photos will be uniform in look.
- Suitable for displaying prints or embroidery.
- Can take pictures of products of various sizes.
Cons:
- Customers could find it hard to understand how the product will appear on them due to the pack shots used in this approach.
- It is impossible to take a picture of the product from various angles.
Nonetheless, ghost mannequins and flat lays are both great and distinctive ways of product photography. Thoroughly review the pros and cons before you choose the right technique for your fashion brand and goods.
What makes it a game changer for online businesses?
Ghost mannequin photography is termed as the game changer on the side of online sellers. With the help of ghost mannequin photography, you can turn the heads of your customers in your favor and increase your sales and brand familiarity very fast. Having a good quality ghost mannequin photo, you can catch customers’ attention very easily. This technique can be used when you are in need of assistance as far as increasing your sales online is concerned. It might be a game-changer in your online business. One advantage of ghost mannequin photography is that it plays a critical role in making online sales.
It boosts your brand image: Professional-looking images of products give a professional look that sets you apart from your competitors. For your customers to trust your brand, it has to look clean and professional, something that the ghost mannequin technique can achieve.
Saves time and resources: Classic photoshoots involving models can take a lot of time and also cost a lot. By using ghost mannequin photography, you get to save on time and cost, whereby you get high-quality images at the end without the extra logistical problems.
Enhances the shopping experience: Online shoppers are looking for an experience that they get when they go window shopping at the stores. The ghost mannequin technique enables the clients to see your products from all perspectives, thus they can imagine how the pieces will appear when they buy them.
Makes products appear more realistic: Online shoppers prefer to have a clear picture of the item they purchase. Ghost mannequin photography gives an impression to make the products look more realistic, as it creates the effect of trying on clothes in a store.
Improves clarity: Visuals in online shopping are very important since customers use them to estimate fit and style. The ghost mannequin effect can give a clearer and more true picture of your product to the customers, which can help the customers get an idea of selecting the right product.
Captures customer attention: Through a cleverly taken ghost mannequin photo, you could grab attention and make your clothing visible to potential buyers.
Ghost Mannequin- A Step-by-Step Guide
Ghost mannequin photography is an advanced method that may only be performed by professionals. However, newbies in the product photographer’s world can flawlessly create such images if they approach the task properly and are guided properly. As a step-by-step guide to ghost mannequin photography, below, I have written a step-by-step guide. With these steps, you will be able to take your product presentations up to another notch.
Preparing for Your Photoshoot
The first step in mastering ghost mannequin photography is good planning. Begin by arranging a clean white background and preparations of your product. Make sure that you have all the requisite mannequins handy – the white mannequins work best with white backgrounds because they make post-production editing and retouching easy.
Moreover, make sure to know how to adjust camera settings and employ techniques of lighting. Excellent equipment is necessary for taking perfect ghost mannequin photos. It will take at least 3 to 4 shots for every product, but more pictures are needed when talking about unique shapes or profiles. It is also good to have many hands to help in the shoot, as you ensure you get all the angles required.
Preparing Your Clothing and Accessories
Choose the clothes and accessories that should be used for ghost mannequin photography. Shirts, jackets, coats, blazers, and dresses are the items, in particular, that will be useful. It probably will require clips, pins, tape, or tissue paper to better fit.
Given the variety of available sizes and styles of ghost mannequins, it is crucial to select one correctly to make it fit. The presence of a variety of mannequins will help your clothing to appear best while being photographed.
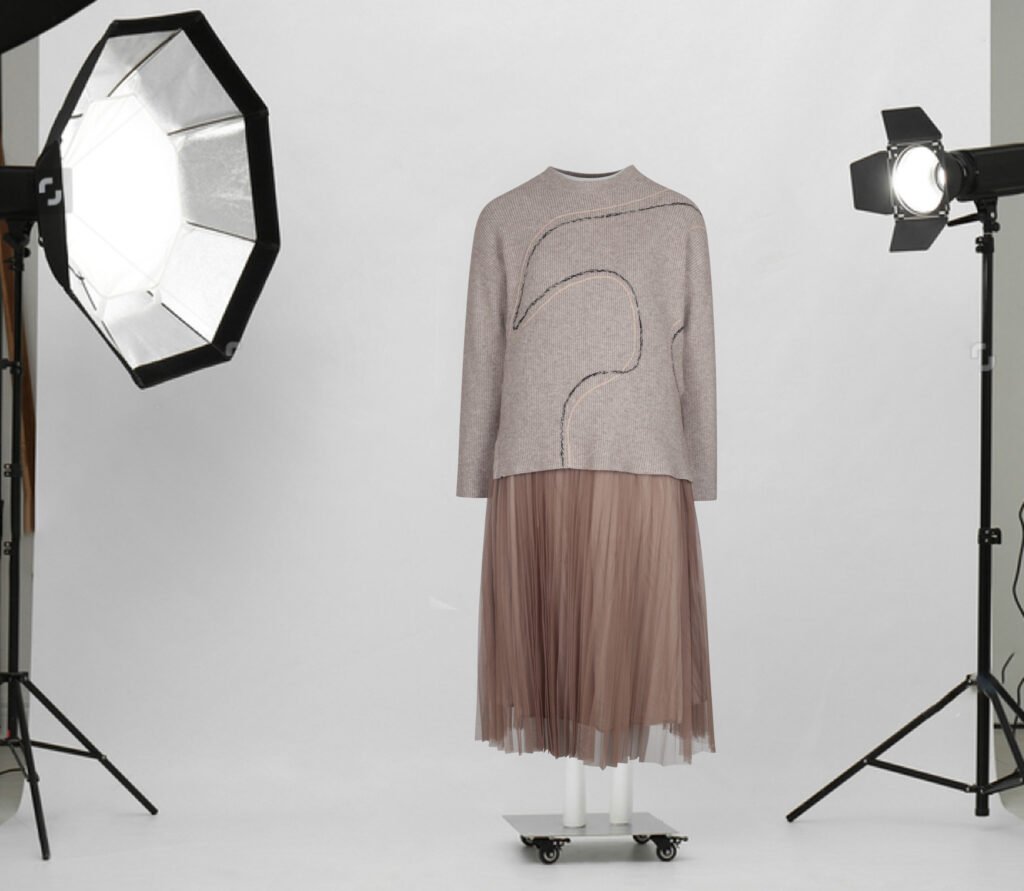
Setting Up Your Photography Studio
Make sure that your studio is ready before you start the shoot. Just as important to the establishment of a controlled environment for your images is the installation of proper lighting. In addition, utilize a clean and clutter-free background in order to ensure that the main item of interest is kept in focus and that there will be no distractions in the photo shoot.
Lighting:
Lighting is an extremely important element of product photography. In the case of ghost mannequin shots, you should choose soft diffused lighting that does not give uneven shadows and provides even coverage. Arrange your lights at different angles that will show the mannequin’s 3D form and even bring out details in the fabrics, which contribute to the appeal of the product.
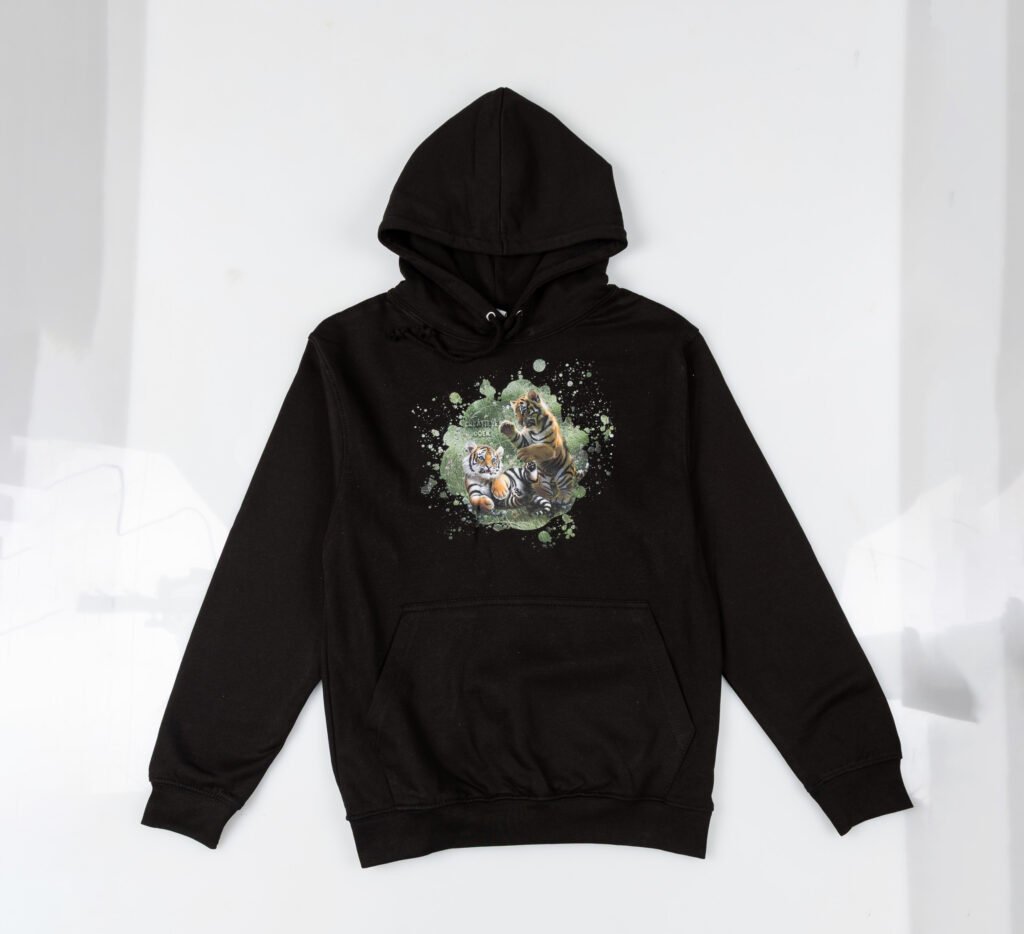
Backdrop:
Use a plain white or gray background to facilitate the post-production editing process. Avoid crowded backgrounds because it can distract from the product, which will make it more difficult for customers to see the true color and the details of the clothing. A neutral background makes things clear and maintains the focus on the product.
Camera:
For maximum results in ghost mannequins, use a high-resolution DSLR or mirrorless camera that is manually operated with interchangeable lenses. Choose a camera that best suits your needs for product photography according to your budget. Canon 6D Mark II is a frontrunner for DSLR users, and Sony Alpha A7R III is a good choice for mirrorless camera lovers. The Nikon D850 will be a very good option for Nikon enthusiasts.
Camera Settings:
To come up with sharp and detailed ghost mannequin pictures, suitable camera settings are necessary. This is how you can arrange your camera:
- Manual Mode: Put your camera in manual mode in order to keep full control of the settings.
- ISO: Frankly, try to use an ISO of 100-200 to avoid noise and have a pure picture.
- Aperture: Employ a narrow aperture (f/8, f/11) to have a great depth of field to capture the whole garment in sharp focus.
- Shutter Speed: Set your shutter speed to match your aperture, and normally around 1/125th for the studio lighting.
Tripod:
A good tripod is very vital to ensure sustained framing from one shot to another. It assists in the reduction of camera shake, and thus your images remain pointed and well-settled even when taking pictures with an extended time of exposure or when focusing on different angles of a subject matter.
Framing & Composition:
Do not forget about the way you compose your shots. Please, do your best to put your camera at the chest level or head level of the dummy. Fill the frame with the clothing so that the dummy is kept centered in the frame. To make a unified appearance of your catalog, it is not only important but necessary to have angle consistency in the front, back, and side photos.
Capture your images:
When you have all the setup ready, it’s time you take your images. Aim to shoot at least 3 to 4 shots of each product. Don’t forget to take the photo from the front or back, on the mannequin or the model, as well as a flat lay that may be done on the front/back on a foam board (white). When you do a virtual delete of the mannequin in Photoshop, you should take a set of photos of the product inside out to cover the gap.
The Best Practices and Professional Hints in Ghost Mannequin Photography
There is an art of producing a class-perfect ghost mannequin shot that needs the mastery of skills in technique, equipment, and post-production. To improve your ghost mannequin photography, below are some expert tricks:
- Choose the Right Mannequin: Always make sure that you choose an adjustable mannequin that matches the size and shape of your target audience in order to have a better fit for your clothing.
- Control Your Studio Environment: Consistency is key. Apply soft, diffused light to reduce shadows, and this is more manageable in comparison to harsh directional light that may cause unwanted results.
- Editing the Mannequin Seamlessly: To crop the mannequin as well as the areas it covers, sophisticated editing software is required. Make a fastidious account of every little detail to achieve a perfect image.
- Neutral Background for Easy Editing: Editing is easier with a non-descriptive background, such as white or light gray, because you won’t get unwanted color casts. It also makes sure the spotlight is on the product, helping it to stand out.
- Instead of just getting a shot of the product, let the photographer go crazy with their camera and capture it from numerous angles. Part photographed product, shoot it from different angles, such as front, back, and sides, to have a complete product view. Remember that you need to shoot close-ups of delicate details.
- Avoid Over-Editing: Although editing is important, too much of it can make the output of your product seem unnatural. Try to go for a balanced approach in order to maintain authenticity in your images.
- Maintain Consistency Across Product Listings: To maintain uniformity in the look of all your product images, maintain the position of your camera. This will help you create uniformity in your shots.
- Use Reference Points: Mark places for your mannequin, camera, and lighting setup to achieve consistency when doing multiple products. This will aid in standardizing the process to have even results.
- Invest in Quality Lenses: A good lens can make a great difference to the sharpness of your pictures, thus eliminating the necessity for post-production sharpening. It is important to achieve a level of clarity when capturing fabric textures.
- High-Resolution Camera for Detail: Always take a photo of the product using a high-resolution camera so that you do not miss any detail of the product. This will enable customers to keenly check on textures and design elements as it will go a long way in adding up to the visual outlook of your product.
Editing a Ghost Mannequin Image

Post-production editing is very important for obtaining the ghost mannequin effect from your photos after the capturing process. It is possible to do the removal using photo editing software to remove any distracting elements and background. Also, you are able to adjust brightness, contrast, and color balance to improve the look of the clothing. In order to make it seem that your invisible model is wearing the garment, it is possible to blend the two shots (front and back) provided that it has been done smoothly.
Here is the step-by-step process of editing the ghost mannequin photography on Adobe Photoshop:
- Open Adobe Photoshop, select and open your image by going to … File > Open.
- Click on the Pen Tool from the toolbar and make a clipping path.
- Choose and develop a new course around the product.
- Try and draw the clipping path around the product, eliminating the unwanted parts of the image.
- The selected clipping path is to be pressed on Ctrl + Enter.
- Go to Select > Modify > Feather, or use Shift + F6 to apply a 05mm feather, so the edges are smoother.
- Press Ctrl + J to duplicate Layer 1 (the product layer).
- Mask afterward the duplication of the background layer, and select a solid color for the layer.
- Open another image, and manipulate its layer in comparison to the main image with the help of the Warp Tool.
- Provide a retake of the clipping path to eliminate the unwanted sections.
- For softer edges and inversion, use Select > Modify > Feather or Shift + F6, Ctrl + I.
- Add a shadow effect to the back part of the product with the creation of a new path.
- To soften the shadow, go to Select > Modify > Feather or take Shift + F6.
- Finally, multiply the layer after duplicating and adding a mask.
Now, you have perfectly done shadow and ghost effects on your photos. You can equally edit your ghost mannequin photography with the following easy steps.
Benefits of ghost mannequin photo editing services outsourcing
By outsourcing your ghost mannequin photo editing, you can concentrate on other core aspects of your business, such as product development marketing, and customer service. It is usually than to hire a professional editing service as compared to having an in-house team. These service providers come with experience and expertise, hence a guarantee of quality and uniformity in results, giving your product images that professional look.
Outsourcing will give you flexibility to be able to adjust your photo editing needs depending on seasonal changes or, if possible, for a specific marketing campaign, without having to employ people permanently. Professional providers are often in a position to provide faster turnaround time, therefore, you are sure to have your product images in readiness for marketing and sales in time.
These service providers always ensure that you receive the latest editing procedures and techniques, as well as the software that enables you to edit the images using the latest gadgets. In charge of product photography, outsourcing partners know how to best represent your products. In addition, they can easily handle large quantities of images so that you do not waste your time and resources.
When your business grows, outsourcing offers scalability in photo editing so you can scale your business in a snap. The fact that experts are serving you with your product images can offer peace of mind, and you will be able to spend your time growing other areas of your business.
Ghost Mannequin Photography Frequently Asked Questions
- How much is Ghost Mannequin Photography Services?
- The pricing of ghost mannequin photography varies. If you want high-quality images or something premium kind of things, you’ve to pay accordingly. Besides, depending on the firm, the charge would be different too, costing you as little as $0.99 to as much as $35 per image. So, it’s best to discuss with the company about your requirement or preference for the platform to do the ghost mannequin photography. This will help you keep things within your budget.
- What does the Ghost Mannequin Photo Editing involve?
- As the name suggests, ghost mannequin photo editing helps remove the mannequin. During post-production, removing the background also becomes easy with this technique. To spice up the thing, it brings a ghostly feel to the clothing image. However, to complete this process, you should hire an expert to do all the editing to make images look more realistic.
- What does a ghost mannequin service comprise?
- It seems magical when you implement the ghost mannequin service because this wizardry can make clothes look splendid on e-commerce sites. Interestingly, this service involves no real models. Photographers just make it done with mannequins—such a clever move! After that comes the editing part. During this post-production, the dummy vanishes.
- Can you use ghost mannequin techniques outside of studio settings?
- Newbie photographers have left the days of struggle behind. They don’t require having a studio for ghost mannequins. Capturing the image pretty much anywhere outside before editing has changed the game. The right location is the key, though! Have proper lighting and set up, and bang your dummy will work as a model.
Conclusion
Ghost mannequin photography is a special and effective method of presenting items for clothing brands and online stores. With the ideal invisible ghost mannequin photography, you will provide breathtaking pictures that catch the attention of the audience and boost sales. Having the right equipment, paying attention to details, and the use of ghost mannequin photo editing in post-production are vital to effective ghost mannequin photos.
I have provided an elaborate guide on writing ghost mannequin photography above. I hope that after reading the article, you have learned the technique of invisible mannequin photography.