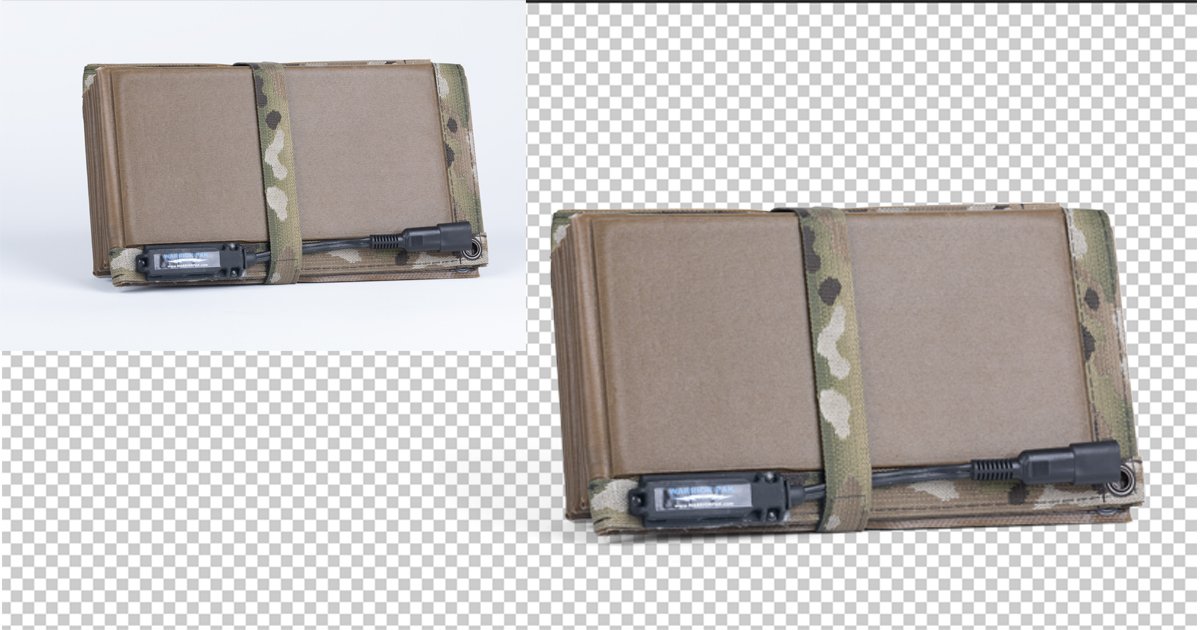
Understanding the Importance of Transparent Backgrounds
In product photography, the significance of transparent backgrounds cannot be overstated. A transparent background elevates the visual appeal of products, making them stand out effectively. This is particularly important in today’s competitive marketplaces, where consumers are inundated with options. By implementing background removal techniques, photographers can create images that are not only striking but also professional in quality.
Transparent backgrounds lend themselves to versatility. With a clean, unobtrusive backdrop, product images can be utilized across various platforms, including e-commerce websites, catalogs, and marketing materials. This adaptability ensures that the product remains the focal point, free from distracting elements. It allows marketers and sellers to showcase their merchandise in formats suitable for various media, enabling a cohesive presentation that enhances consumer engagement.
Furthermore, using transparency in product photography aids in maintaining brand consistency. For businesses that require uniformity in their visual assets, having a standard transparent background can help to solidify their identity. This uniformity can resonate with audiences, building trust and recognition over time. By removing backgrounds that do not align with branding, companies can more effectively communicate their message and aesthetic to potential buyers.
Moreover, transparent backgrounds facilitate the ease of photo editing, as they allow products to be seamlessly integrated into different backgrounds without visible seams or disruptions. For instance, a product can be effortlessly placed on a seasonal color palette, creating a context that encourages purchase. When executed correctly in Photoshop, background removal can lead to exceptional imagery that elevates marketing strategies while driving sales.
In summary, the importance of transparent backgrounds in product photography is multi-faceted, impacting not only the visual appeal but also the branding and editing processes. Emphasizing this aspect of photo editing can significantly enhance the effectiveness of product representations in a visually driven marketplace.
Preparing Your Image for Editing
To effectively engage in the background removal process, it is crucial to begin with a well-prepared image. Selecting the right image format is the first step; typically, JPEG and PNG formats are preferred for product photography. While JPEG is widely used due to its balance of quality and file size, PNG is advantageous for images requiring transparency, making it a good choice for creating transparent backgrounds.
Next, the resolution of the image plays a significant role in the quality of the final product. High-resolution images ensure that details remain crisp and clear after editing. A minimum resolution of 300 DPI (dots per inch) is recommended for professional-grade product photography. This allows for ample detail, especially when the image is enlarged or displayed on various platforms.
Lighting is another dimension to consider during the preparation stage. Well-lit images reduce the occurrence of shadows and highlights that can complicate the background removal process. Natural light tends to be most flattering for product photography, so shooting in daylight or a well-lit environment is advised. If utilizing artificial lighting, aiming for soft, diffused sources can help to eliminate harsh contrasts.
Once the appropriate format, resolution, and lighting have been established, open the image in Photoshop. Begin with basic adjustments such as cropping out unnecessary elements and correcting brightness levels to enhance visibility. These preliminary adjustments not only improve the composition but also provide a cleaner canvas for background removal. Ensure that the product is the focal point of the image, setting the stage for effective photo editing later on. Taking these initial steps will facilitate a smoother workflow throughout the background removal process in Photoshop.
Removing the Background Using Photoshop Tools
Removing backgrounds in Photoshop can significantly enhance product photography by allowing clear focus on the subjects. Several tools are available in Adobe Photoshop to facilitate background removal, making the process more efficient. Among these tools, the Quick Selection Tool, Magic Wand Tool, and Pen Tool are the most commonly used.
The Quick Selection Tool provides a user-friendly approach to selecting areas of an image by simply dragging the brush over the desired region. To use this tool, select it from the toolbar, then adjust the brush size if needed. Click and drag over the section you want to retain, allowing the tool to automatically detect edges. To refine your selection, hold down the Alt key (Option on Mac) and brush over any areas you wish to exclude. This method is ideal for simpler backgrounds.
Alternatively, the Magic Wand Tool is perfect for images with uniform background colors. With this tool selected, click on the background area. The tool will select all adjacent pixels of the same color. You can adjust the tolerance setting for a more precise selection. To finalize your background removal, go to Select > Inverse, which will highlight your product instead. Again, use the Refine Edge or Select and Mask features to polish your selection.
Lastly, the Pen Tool offers the most control and precision but requires more time and practice. This tool allows you to create a path around your product. Use the Pen Tool to click around the edges to create anchor points. Once the path is complete, right-click and select “Make Selection,” enabling you to remove the background effectively. Although this method may be more complex, it yields the most exacting results.
Challenges such as intricate backgrounds or soft edges often arise during background removal. To address these challenges, it is advisable to zoom in on the image for greater precision and to take advantage of feathering and smooth options to soften selection edges. Ultimately, mastering these Photoshop tools can greatly enhance your ability to perform effective background removal, resulting in eye-catching product photography.
Saving the Image with a Transparent Background
Once you have completed the background removal process in Photoshop, the next crucial step is to ensure that your edited product image is saved in a format that maintains its transparent background. The significance of this action cannot be overstated, as the choice of file format will greatly influence how the image is utilized in different applications, particularly in product photography.
Photoshop provides several file formats, with the most commonly used for preserving transparency being PNG and TIFF. PNG (Portable Network Graphics) is widely preferred for web use because it supports transparency and provides a good balance between quality and file size. When saving your image as a PNG, it is important to select the option for 24-bit depth, which ensures that the transparency is preserved effectively. This is particularly useful for e-commerce sites, helping to maintain a clean and professional look for products.
On the other hand, TIFF (Tagged Image File Format) is often favored for printing due to its high quality and flexibility. TIFF files support larger color depths and can handle multiple layers, making them excellent for product photography that requires intricate details. When saving as a TIFF, be sure to check the “Save Transparency” box in the export settings to ensure that the transparent background remains intact.
After deciding on the appropriate format, consider the export settings. These settings impact image quality; thus, it is vital to choose options that enhance resolution without compromising on detail. For optimal results, always keep the original file intact, allowing for future modifications. Once saved, these edited images with transparent backgrounds can be effectively utilized across various platforms, from online stores to marketing materials, enhancing product presentation and visibility.


