Welcome to the captivating world of fashion and product photography, where the power of a clean white background can transform your visuals into stunning works of art. With just a few clicks in Photoshop, you can unlock the secrets of creating a timeless and versatile look that captivates your audience.
In this blog post, we will delve into the magic of Photoshop’s white background setup, guiding you through the steps to master this essential technique. So, grab your camera, ignite your creativity, and get ready to make your fashion and product shots shine like never before. It’s time to embark on a journey that will elevate your photography skills to new heights.
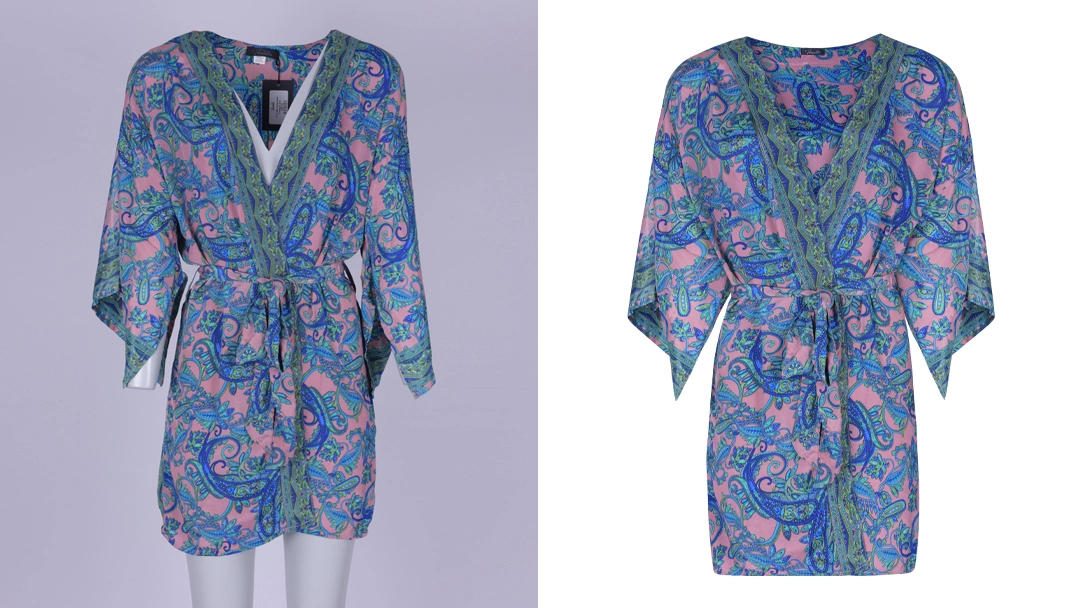
Understanding the Importance of White Backgrounds
Regarding fashion and product photography, the background is one of the critical elements that can make or break your image. And when we talk about backgrounds, nothing beats the timeless and versatile beauty of a clean white canvas.
Let’s explore why white backgrounds are crucial in creating captivating visuals that grab the viewer’s attention.
A. Enhancing focus on the subject
Imagine a stunning piece of clothing or a sleek product. You don’t want some irrelevant element in the background to steal the show. A white background is a silent partner, allowing your subject to shine and take centre stage. Eliminating visual clutter directs the viewer’s eyes straight to what matters most—the product itself. It helps you communicate your message clearly and concisely, leaving no room for distractions.
B. Creating a timeless and versatile look
Fashion and trends come and go, but the allure of a white background remains constant. Whether capturing the latest fashion statement or showcasing a product, a white backdrop offers a classic and elegant aesthetic. It transcends time, allowing your photographs to remain relevant and impactful even as styles evolve. From minimalist to extravagant, a white background adapts effortlessly to various concepts and themes, making it a go-to choice for many photographers and brands.
C. Harmonizing with various branding requirements
In the world of fashion and product photography, maintaining a consistent and cohesive brand identity is paramount. A white background is a blank canvas, ready to be infused with your brand’s unique essence. It seamlessly integrates with different marketing materials, websites, and advertisements, ensuring a coherent visual experience for your audience. A white background can easily accommodate your branding requirements, whether your brand exudes modern sophistication or playful vibrancy.
Preparing for the Photoshoot
A successful photo shoot requires proper preparation before diving into the world of white backgrounds. Here are a few essential steps to consider:
A. Setting up a dedicated studio space
Creating a dedicated studio space allows you to control lighting conditions, minimize external distractions, and ensure a consistent environment for your shoots. Set up a clean and clutter-free area where you can easily manipulate the lighting and position your subjects.
B. Choosing the right lighting equipment
Lighting is key to achieving a flawless white background. Opt for soft, diffused lighting to eliminate harsh shadows and create a smooth, evenly lit surface. Experiment with different lighting setups, such as studio strobes, continuous lights, or natural light, to achieve the desired effect.
C. Selecting the appropriate camera and lens combination
Investing in a high-quality camera and lens combination is essential for capturing detailed and crisp images. Consider the type of fashion or product you’ll be shooting and choose a lens with the appropriate focal length for the desired composition. Experiment with different lenses to achieve the desired perspective and ensure your camera settings are optimized for capturing accurate colors and exposure.
Shooting Techniques for White Backgrounds
A. Natural light can work wonders in creating a soft, dreamy effect on your fashion and product photographs. Imagine the ethereal glow of sunlight gently illuminating your subject, casting a captivating aura. Position your subject near a large window or shoot outdoors during the golden hour to harness the magic of natural light. Try playing around with the distance and angle of your shots to see what works best. Let the soft shadows and gentle highlights dance on your white background, creating a mesmerizing composition.
B. When precise control is paramount, artificial lighting comes to the rescue. You can manipulate light intensity, direction, and quality to create a controlled environment using artificial light sources such as strobes or continuous lights. Set up your lights strategically to evenly illuminate your subject and the background. This method ensures consistent results and allows for greater flexibility in adjusting the lighting setup to match your creative vision. Take charge of your photoshoot and sculpt your subject against a pristine white background.
C. Shadows and reflections can be sneaky little culprits when it comes to disrupting the clean white background you desire. To avoid their interference, be mindful of your lighting setup. Position your lights to minimise shadows and prevent unwanted reflections on the background. Utilize reflectors or diffusers to soften harsh lighting and eliminate potential distractions. You can achieve a flawless, distraction-free white canvas by carefully balancing your subject and the background.
Importing and Organizing Images in Photoshop
A. The journey from your camera to your computer is crucial in the post-processing workflow. Once you’ve captured your stunning fashion and product photographs, it’s time to transfer them to your computer for further editing. To see the photos you’ve taken, just connect your camera to your computer by USB connection or memory card reader. Take care to organize your files systematically, creating folders for different projects or categories. This organization will save you time and effort when searching for specific images later.
B. Efficient post-processing begins with efficient organization. As you import your images into Photoshop, organising them in a way that facilitates seamless workflow management is essential. Create a logical file structure, categorizing images by date, project name, or other relevant criteria. Consider using software like Adobe Bridge or Lightroom to streamline the process further. These tools allow you to add metadata, keywords, and ratings, making it easier to find specific images when needed.
C. Adobe Lightroom, a powerful companion to Photoshop, offers a range of benefits for photographers. It serves as a bridge between shooting and editing, allowing you to perform initial adjustments to your images before diving into Photoshop. Lightroom’s intuitive interface lets you easily tweak exposure, white balance, contrast, and other essential settings. By using Lightroom as a preliminary step, you can set a solid foundation for your white background setup in Photoshop and streamline your editing process.
Creating a White Background in Photoshop
A. The Magic Wand tool is your quick and efficient ally in selecting your white background. With a simple click, it automatically detects and sets areas of similar color and tone, allowing you to isolate your subject effortlessly. Adjust the tolerance level to refine the selection and accurately capture the background. This tool is ideal for images with well-defined subject-background boundaries and consistent lighting.
B. The Pen tool comes to the rescue Regarding complex selections or intricate details. The Pen tool’s precision and versatility enable you to create precise paths around your subject, accurately separating it from the background. Take your time to create anchor points and curve handles to follow the contours of your subject. Once the path is complete, convert it into a selection and refine the edges. The Pen tool allows for precise selection and a clean separation of the topic from the backdrop.
C. Refining selection edges is crucial for achieving a polished white background effect. The Select and Mask feature in Photoshop provides advanced options for refining selections. Accessible through the Select menu or right-clicking on a selection, Select and Mask offers tools like the Refine Edge Brush and the Feather slider to fine-tune your selection’s edges. Use these tools to smoothen rough edges, eliminate fringing, and ensure a clean transition between your subject and the white background. This step adds that final touch of perfection to your fashion and product photographs.
Adjusting Exposure and White Balance:
A. Balancing exposure levels for a seamless white background
In fashion and product photography, achieving a seamless white background is crucial. To make your subject pop and the background appear flawlessly white, it’s crucial to balance the exposure levels. Use Photoshop’s exposure adjustment tools to adjust the brightness and contrast of the image. Gradually tweak the settings until the background looks pure white without losing essential details of your subject.
B. Correcting white balance to ensure accurate colors
White balance plays a significant role in maintaining accurate and true-to-life colors in your images. With Photoshop’s white balance adjustment tools, you can quickly correct any color casts that may have been introduced during the photoshoot. By eliminating unwanted color tints, you can ensure that your fashion or product’s true colors shine through.
C. Utilizing adjustment layers for non-destructive editing
One of the advantages of using Photoshop is the ability to work with adjustment layers. These layers allow you to edit your image without permanently altering the original pixels. By utilizing adjustment layers for exposure and white balance adjustments, you can experiment with different settings and easily revert back or make further adjustments. This non-destructive editing workflow ensures flexibility and preserves the integrity of your image.
Polishing the Image:
A. Removing imperfections and distractions
Removing imperfections or distractions that may detract from the overall aesthetic is essential to creating a professional image. Use Photoshop’s retouching tools, such as the healing brush or clone stamp tool, to remove blemishes, stray hairs, or other unwanted elements. This step ensures that your fashion or product takes centre stage without any distractions
B. Enhancing the subject's details and textures
Capturing your fashion or product’s intricate details and textures is essential in showcasing its quality and uniqueness. With Photoshop, you can enhance these details using tools like the sharpening or high-pass filters. Carefully apply these adjustments to enhance the fine lines, textures, and intricate patterns, bringing out the best in your subject.
C. Applying creative edits while maintaining a natural look
While it’s vital to enhance your image, it’s equally crucial to maintain a natural and authentic look. Strive for a balance between creativity and realism. Use Photoshop’s adjustment layers, such as curves or levels, to fine-tune the overall tone and color of the image. Experiment with different settings to achieve the desired artistic effect while ensuring your fashion or product looks natural and appealing.
Fine-tuning the White Background:
A. Enhancing brightness and contrast for a crisp appearance
Enhancing the brightness and contrast is essential to achieve a crisp and clean white background. Use Photoshop’s adjustment layers or levels to brighten the background while clearly distinguishing between the subject and the background. By fine-tuning these elements, you can ensure your white background appears visually striking and professional.
B. Eliminating any remaining color tints or inconsistencies
Even after adjusting the exposure and white balance, there might still be subtle color tints or inconsistencies in the white background. To eliminate these, utilize selective color adjustments in Photoshop. Target specific color ranges, such as neutrals or whites, and make slight tweaks to achieve a uniform and pristine white background.
C. Adding depth and dimension with subtle shadows or highlights
While a white background is meant to be clean and minimalist, adding subtle shadows or highlights can bring depth and dimension to your image. Use Photoshop’s dodge and burn tools or adjustment layers to selectively add shadows or highlights to some regions of the background. Be mindful of maintaining a subtle and natural effect, as the goal is to enhance the overall composition without overpowering your fashion or product.
Saving and Exporting the Final Image:
A. Choosing the appropriate file format for various purposes
When saving your final image, choosing the appropriate file format based on your intended use is essential. For web or digital purposes, consider saving as JPEG to balance file size and image quality. Opt for formats like TIFF or PSD for print or high-quality reproduction to preserve the highest level of detail and color accuracy.
B. Optimizing image resolution and quality
Ensure your image is optimized for its intended use by adjusting the resolution and quality settings during export. To get the best results, balance file size and picture quality. Remember to consider the platform or medium where your image will be displayed to optimize accordingly.
C. Archiving and backing up your work for future use
Don’t forget to create backups of your edited images to safeguard your hard work. Consider establishing an organized archive system to store your final images, layered Photoshop files, and any additional assets used during editing. By doing so, you’ll have easy access to your work in the future and can quickly retrieve or repurpose your images when needed.
Conclusion
Mastering fashion and product photography in Photoshop with a white background allows you to create captivating images highlighting your subject. You can achieve professional and visually striking results by balancing exposure, correcting white balance, utilizing adjustment layers, polishing the image, fine-tuning the white background, and saving and exporting your final image appropriately. Elevate your photography skills and unlock endless creative possibilities with these techniques.