Image masking is a crucial technique in Adobe Photoshop, allowing users to hide or reveal parts of an image with precision. Whether you’re a professional designer or an enthusiastic hobbyist, mastering this skill can significantly enhance your photo editing capabilities. Adobe offers a trial version of Photoshop, enabling you to use its powerful tools for free. Here’s a comprehensive guide on how to perform image masking using Adobe Photoshop.
Step 1: Download Adobe Photoshop Trial
To start, download the latest trial version of Adobe Photoshop from the official Adobe website. This trial typically lasts for seven days, giving you full access to all the features without any cost. Create an Adobe account if you don’t already have one, and follow the instructions to install the software on your computer.
Step 2: Open Your Image
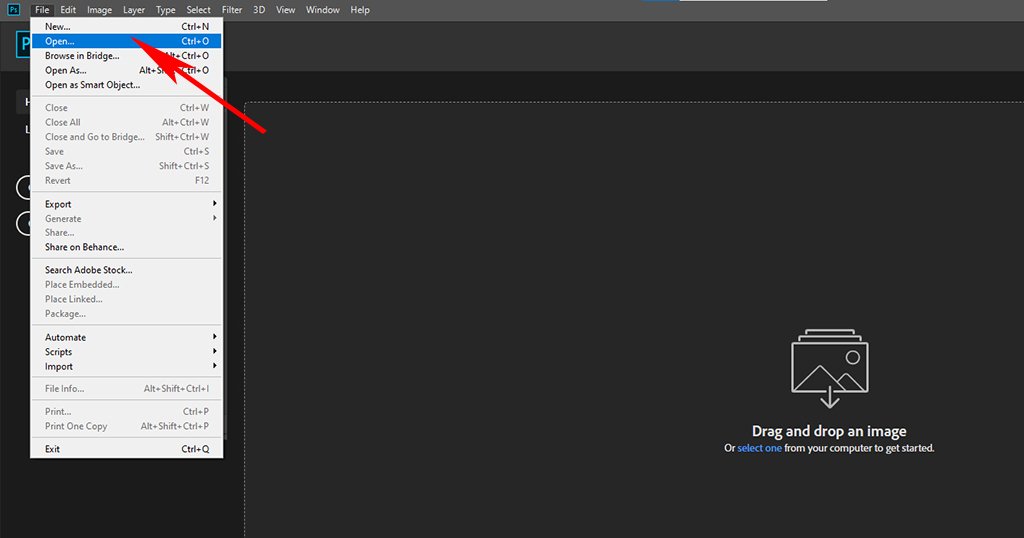
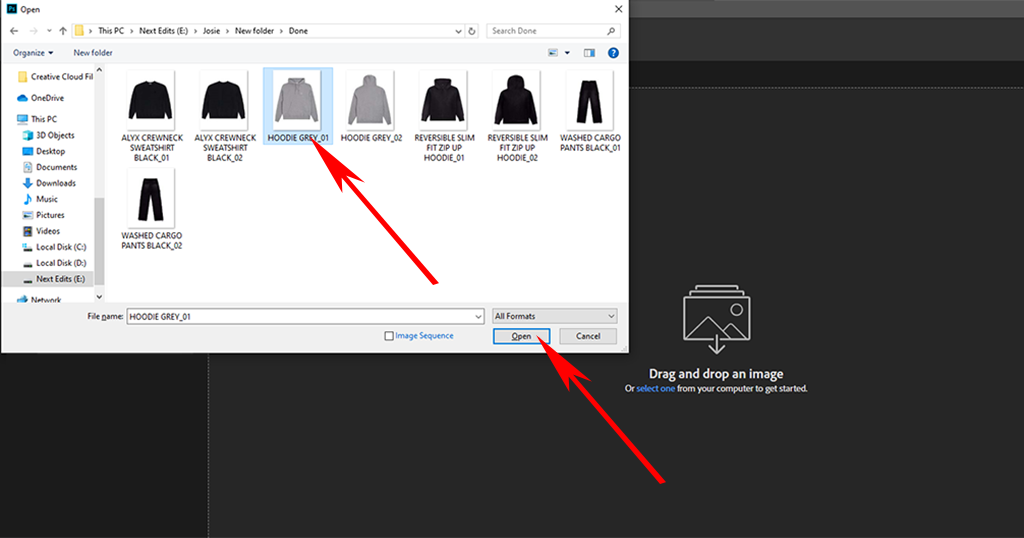
Open your Download Adobe Photoshop app and open the image you want to edit. To do this, go to File> Open > Select the photo from folder > Click open, browse to find your image file, and click Open. The image will appear in the Photoshop workspace, ready for editing.
Step 3: Duplicate the Layer
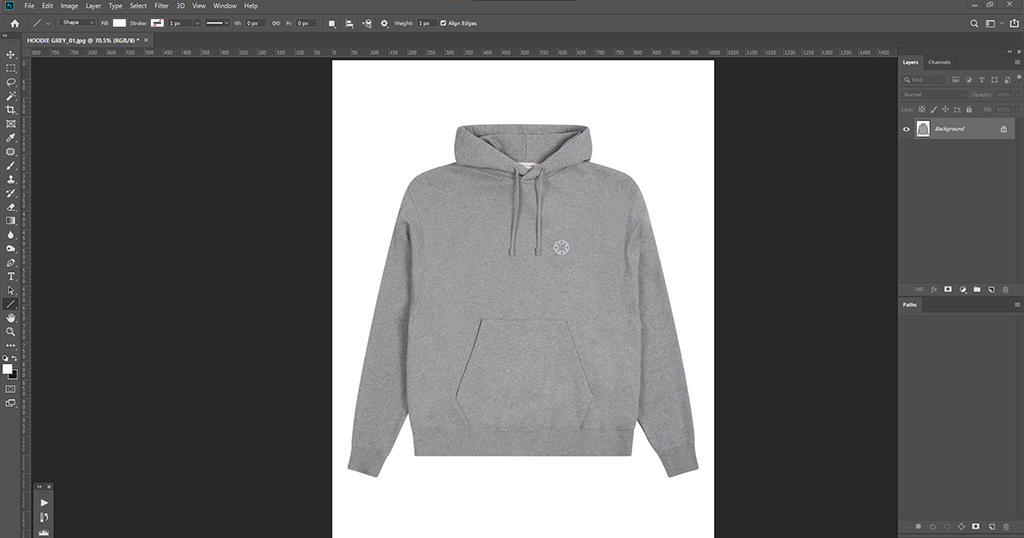
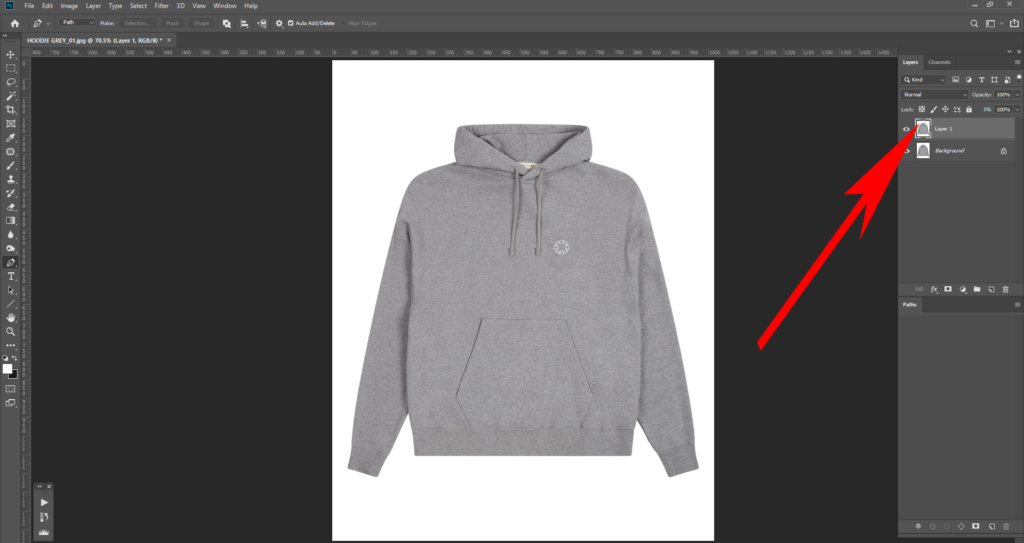
Before making any changes, it’s a good practice to duplicate your image layer. This way, you preserve the original image in case you need to revert any changes. In the Layers panel, right-click on your image layer and select Duplicate Layer or shortcut key Ctrl + J. Rename the new layer for easy identification.
Step 4: USING THE PEN TOOL
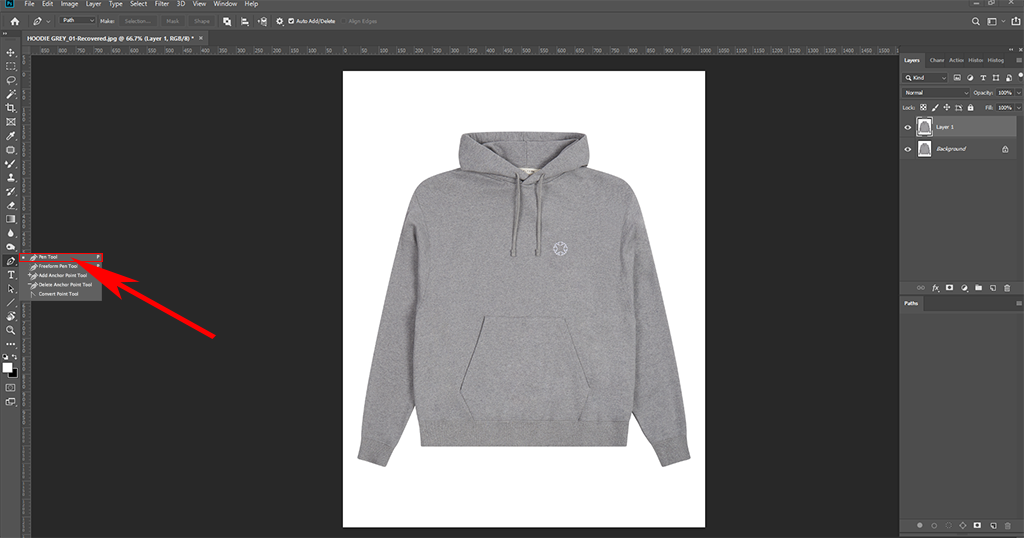
For making a clipping path Select the pen tool from the main toolbar, often on the left side of the screen, as shown in the image below.
Step 5: Create a new path with clipping path
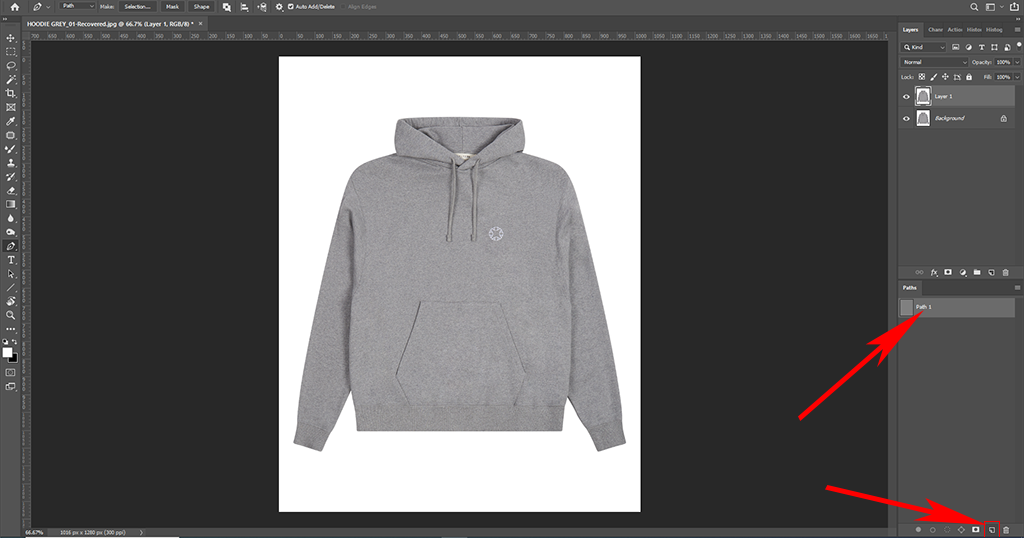
Create a new path, after that use pen tool. Often on the right side of the screen, as shown in the image below.
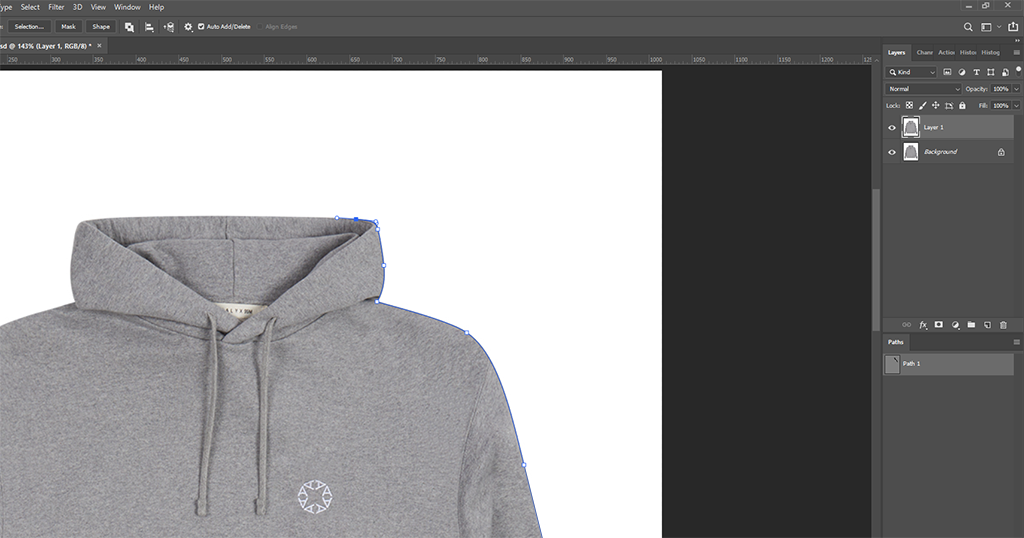
After making “path 1” Start creating a clipping path around the main subject and draw the path line precisely and carefully on the image.
Step 6: Select the area after clipping the path
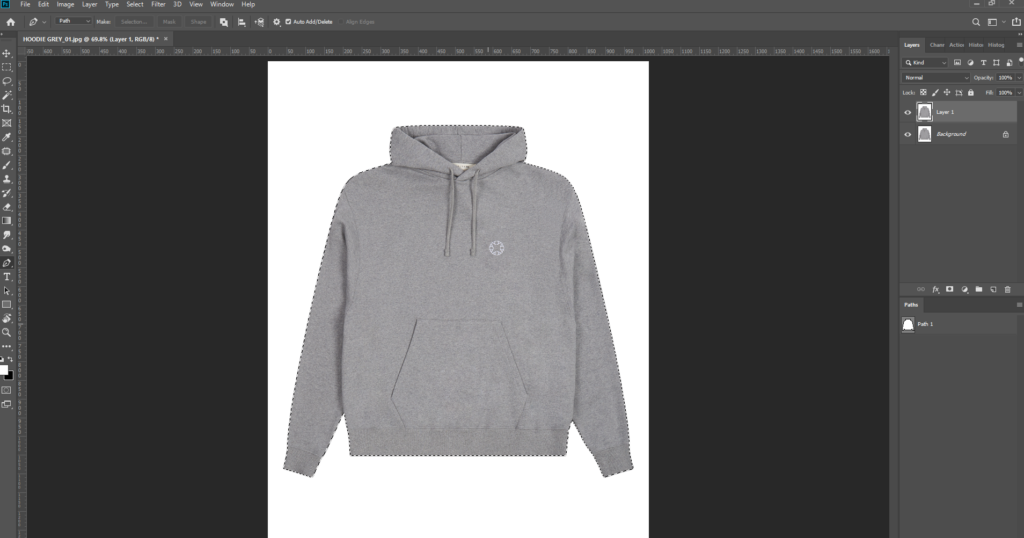
Use the keyboard ‘Ctrl+Enter‘ after the completed clipping path around the main subject.
Step 7: Use the feather for the product area smoothness
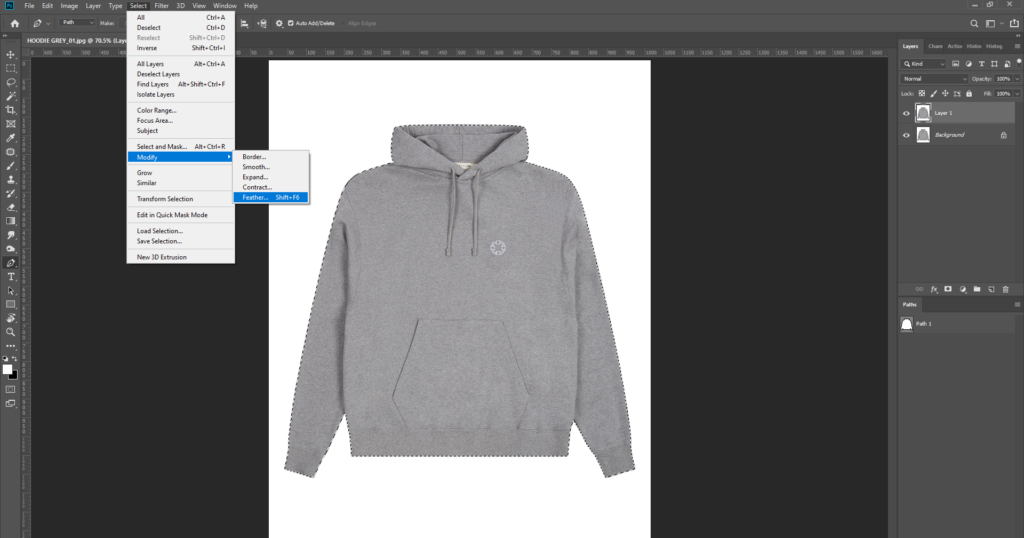
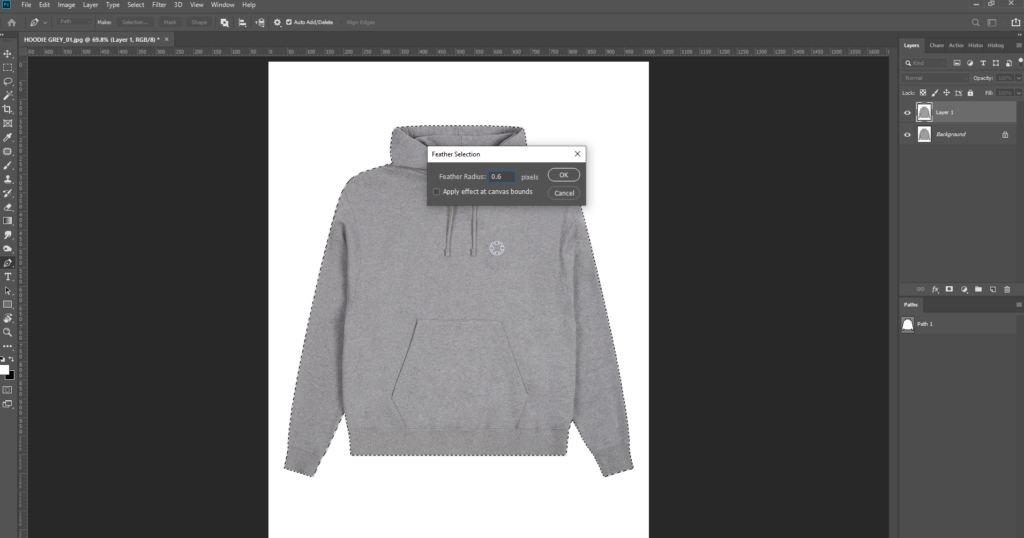
After the completed clipping path and selection around the main subject choose Select> Modify > Feather or using the keyboard shortcut Shift + F6 and apply 0.6 feathers. It will help you with the smoothness of the product cut-out.
Step 8: Select ‘Background color’
Once you’re satisfied with your mask, you can make additional adjustments to the layer. For example, you might want to adjust the brightness, contrast, or color balance. These adjustments will only affect the visible parts of the masked layer, allowing for precise control over your edits.
Step 9: Save Your Work
After completing your edits, save your work by going to File > Save As. Choose your preferred file format, such as JPEG or PNG, and select a location on your computer to save the file. It’s also a good idea to save a copy of your work in Photoshop’s PSD format, preserving all layers and masks for future editing.
Additional Tips
- Use Layer Masks for Non-Destructive Editing: Layer masks allow you to make changes without permanently altering the original image. This non-destructive approach is ideal for experimenting with different effects and adjustments.
- Explore Advanced Masking Techniques: Once you’re comfortable with basic masking, explore more advanced techniques like vector masks, clipping masks, and using channels to create intricate masks.
- Take Advantage of Photoshop’s Resources: Adobe offers a wealth of tutorials and resources to help you master image masking and other Photoshop features. Visit the Adobe website or YouTube channel for step-by-step guides and tips.
By following these steps, you can efficiently perform image masking in Adobe Photoshop during your free trial period in 2024. This method allows you to explore Photoshop’s powerful tools without any cost, enhancing your photo editing skills and enabling you to create stunning, professional-quality images.


