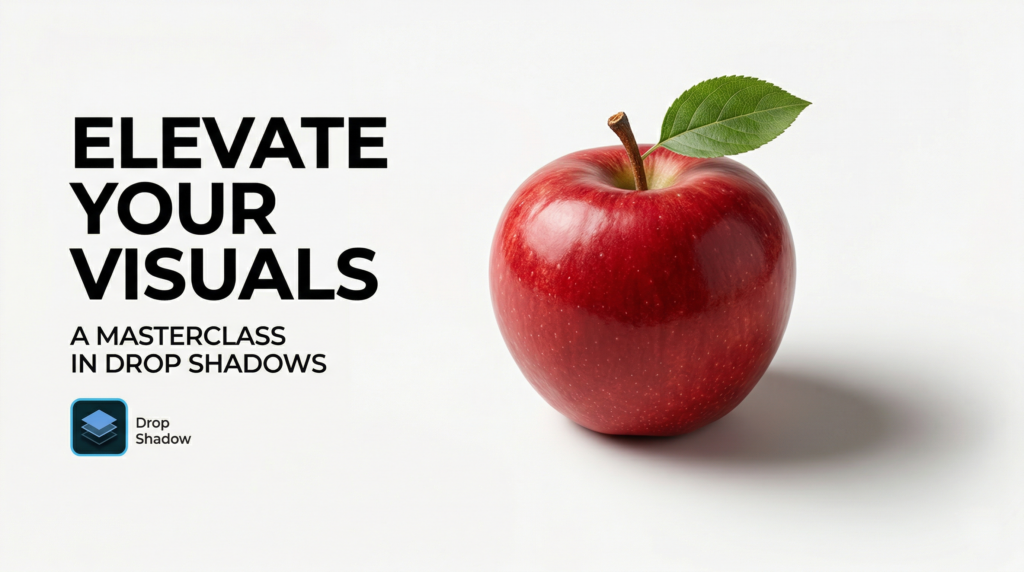
Want to elevate your product photography game? Discover a powerful way to enhance your product photos with the drop shadow effect. There are several reasons to use a drop shadow in product photography.
One answer is that it allows you to display your product photos in 3 dimensions and creates a richness to product photography, and your product visuals are likely to captivate and attract potential customers.
For e-commerce, showcasing product photos that are both eye-catching and realistic is essential. Since customers can’t physically see or touch products online, they rely on visuals, so it’s significant that you present the items in an appealing and lifelike manner.
It is a grueling challenge to create shadows of your products in a studio. You will face several problems if you don’t get in touch with a professional.
A well-placed shadow can transform your product image into something captivating. So, did you ever think about how you can incorporate shadows into your product visuals?
This tutorial will guide you step by step through the straightforward process of adding a drop shadow to your product photo.
Let’s go straight to the heart of the matter…
- Open an image in Photoshop
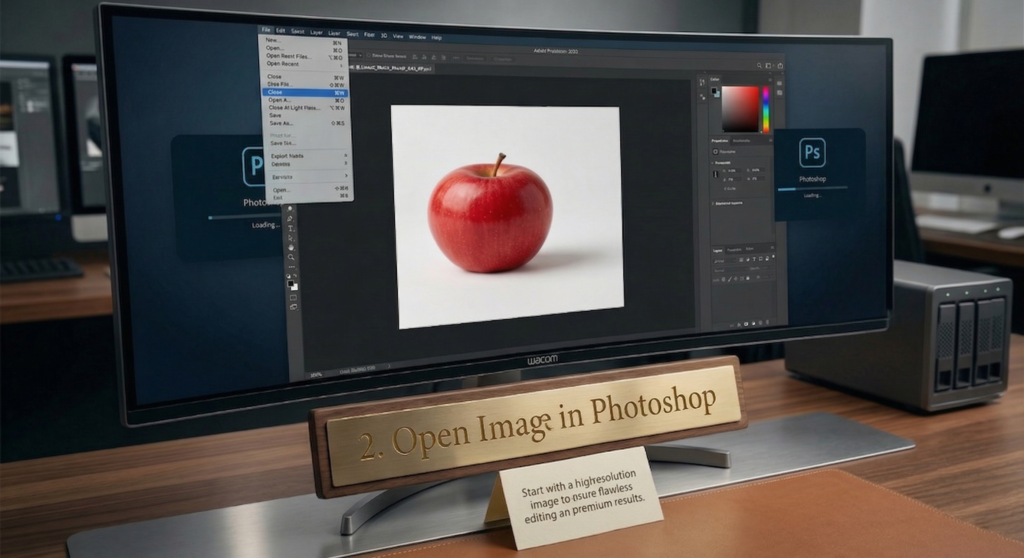
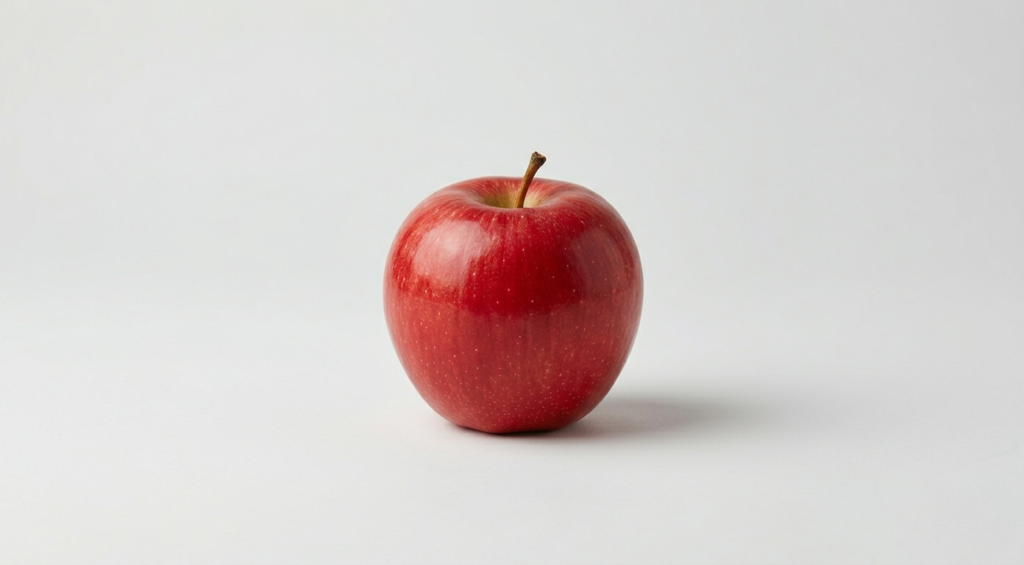
First of all, you have to open your high-resolution image. You cannot overlook this requirement. So, let’s say we have picked an apple to apply a drop shadow. This image of the apple has to be of high resolution.
- Draw a path
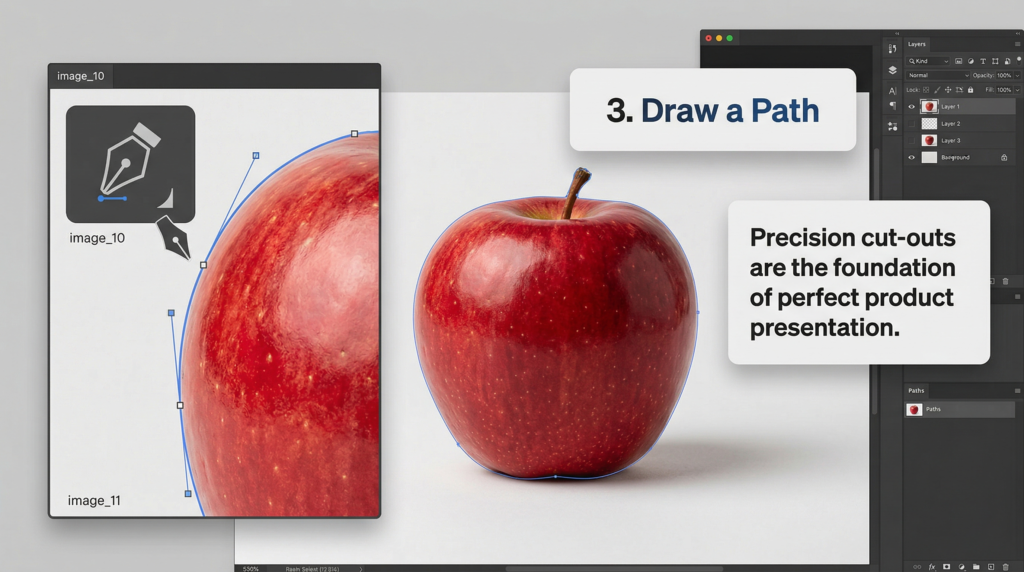
Choose the pen tool from the toolbar on the left-side navigation menu and trace a path along the object’s edge. Once the path is complete, eliminate the image’s background.
- Duplicate the layers
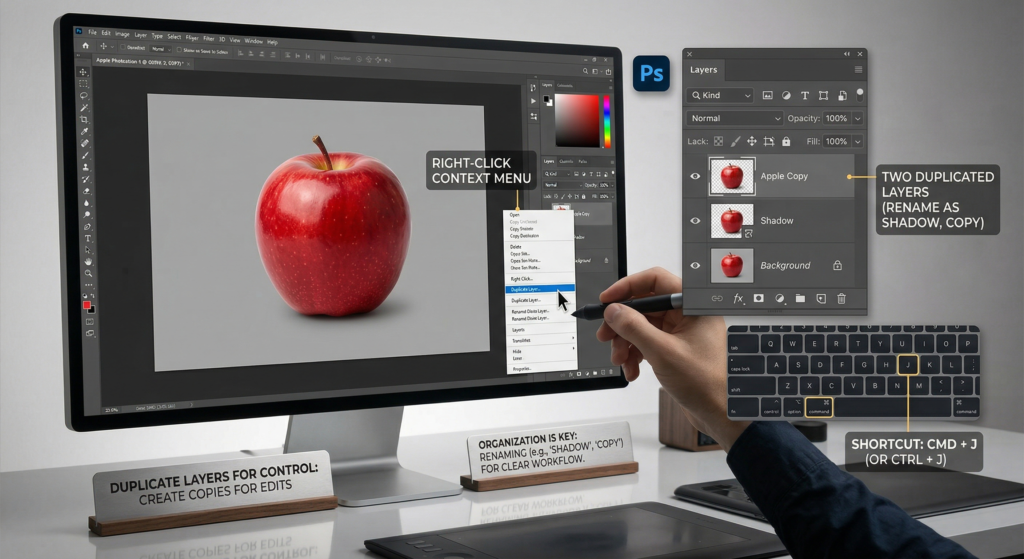
Now navigate to the Layers Panel on the right side of the Photoshop window. Click on the Background Layer and duplicate it by either right-clicking or using the keyboard shortcut. Press Ctrl + J (Windows) or Command + J (Mac) in order to create a copy of the layer.
Don’t forget to duplicate this layer as well to work on the shadow. You can rename the first duplicate layer with ‘Shadow’ and the second one with another name you like. It’s completely optional for a better understanding.
- Enable the Transform Tool
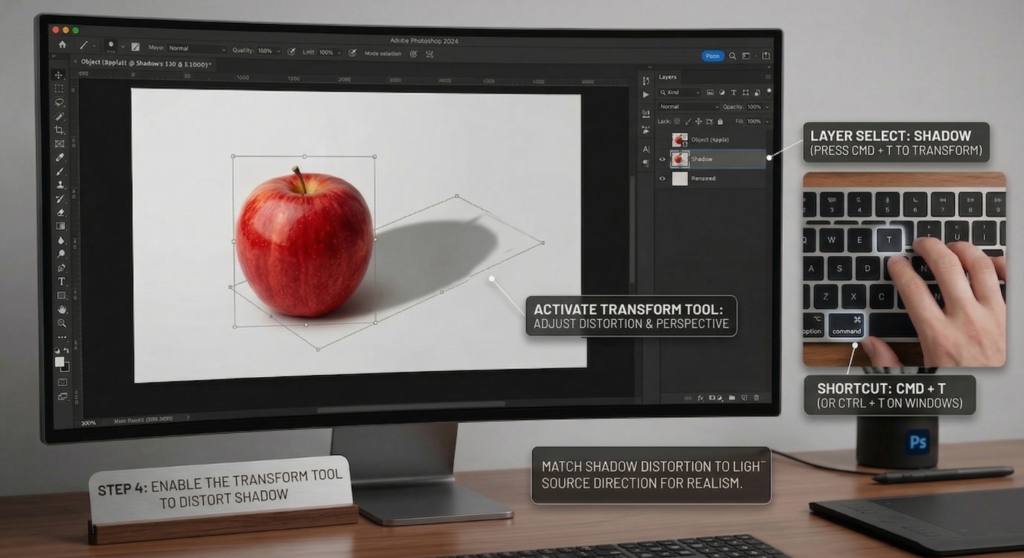
Click on the Shadow layer and press Ctrl + T (Windows) or Command + T (Mac) to activate the Transform tool. After that, right-click and choose “Distort” to adjust the image’s perspective, fitting it with the direction of the light source put on your subject.
If it is required, you can use the Move tool (shortcut: V) to relocate the transformed image for better coordination.
- The Gradient Overlay
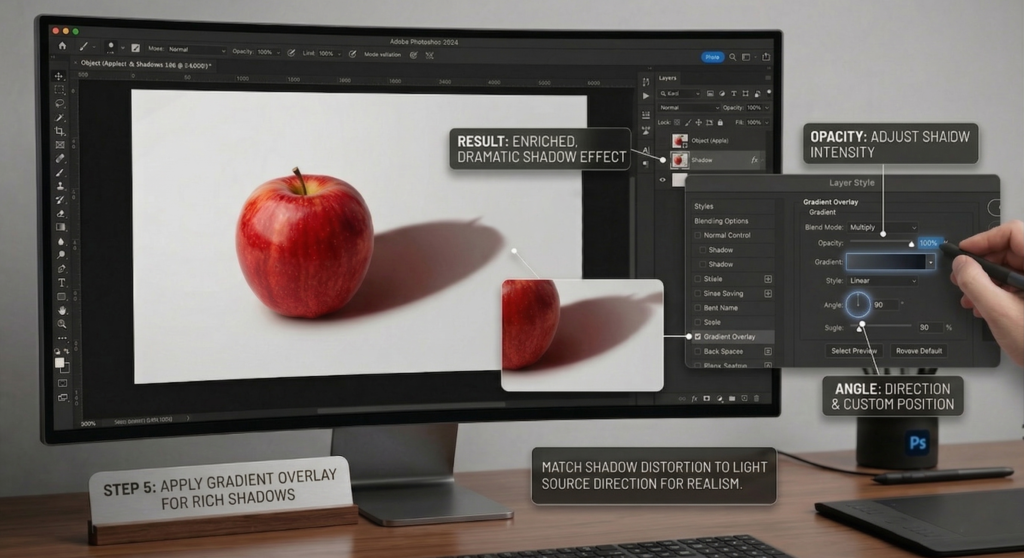
At this point, double-click on the Shadow layer to open the Gradient Overlay settings. This will allow you to modify the color of your transformed image, enriching the shadow effect for a more dramatic appearance. Furthermore, you can polish the shadow’s intensity by adjusting the opacity slider and changing its direction and position using the angle option to drop a more customized shadow effect.
- Convert the Layer into a Smart image
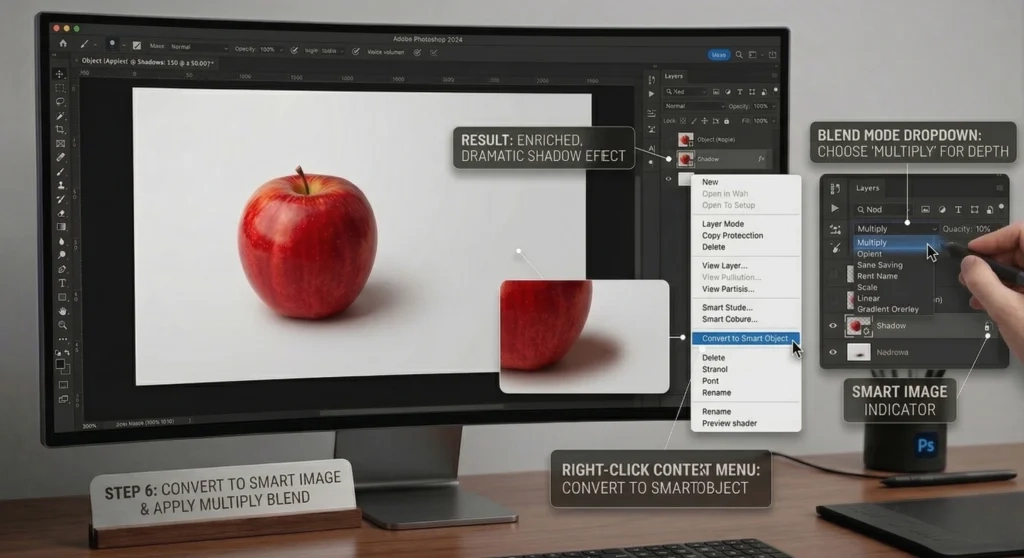
Now, right-click on the Shadow layer in the Layers panel and choose the option to ‘Convert to Smart Object’ from the context menu. After that, click the ‘Blend Mode’ dropdown in the Layers panel and alternate the blending mode to ‘Multiply’ for the desired effect.
- Filter
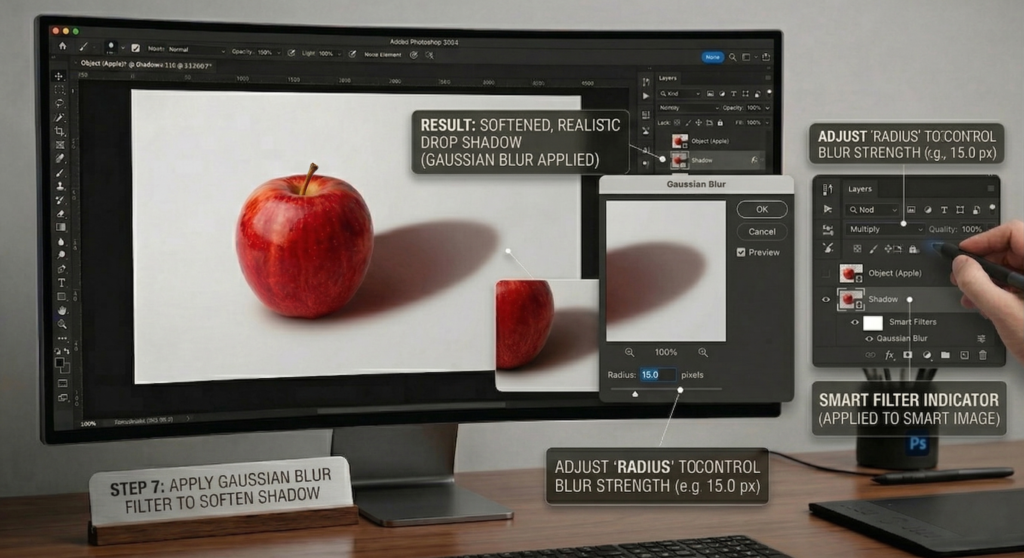
You can go further by proceeding to the “Filter” menu in Photoshop, then selecting “Blur” from the dropdown, followed by “Gaussian Blur” to apply this effect. When the Gaussian blur filter is applied, you should adjust the pixel radius so that you can take control of the strength of the blur.
This tool permits you to explore various shadow effects, taking into consideration that the resolution of each image may vary, providing opportunities with how the blur affects the various details of the image in different ways.
- Perfect shadow
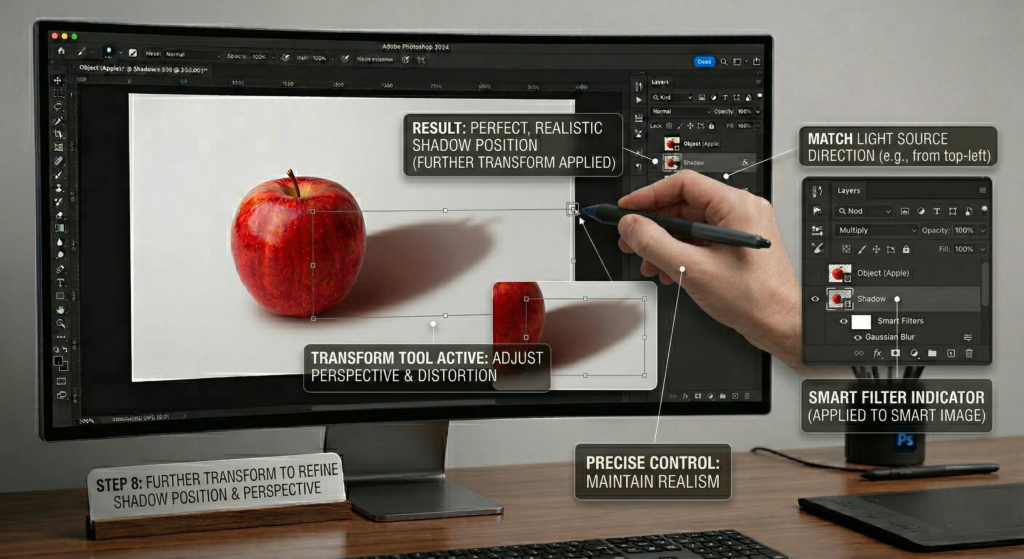
It’s time to refine and further change your shadow using the Transform tool once more. Take time and be careful to consider the position and angle of the light source in your image and adjust the shadow accordingly to maintain a realistic effect. While it’s natural to make mistakes during this process, don’t worry—there is plenty of opportunity to correct any errors through careful adjustments. Always remember that the goal is to keep the shadow subtle and believable, ensuring it enhances the overall realism of your product photo without overwriting.
- Final Result
So here you go! The process of creating a product drop shadow has been completed. Refine your drop shadow using brush settings—adjust opacity, flow, size, and hardness for perfect results.
Creating drop shadows in Photoshop may seem tricky, but practice and attention make it seamless and rewarding.
Follow these steps to turn your product images into professional visuals that grab customers’ attention. Drop shadows enhance your photos, boosting quality for e-commerce, portfolios, or marketing campaigns.
With this, we’ve come to the end of today’s tutorial. We hope you now feel confident applying the drop shadow technique to your product photography. Until next time, stay motivated, keep experimenting, and continue improving your art